Creating discussion and lab sections is a two-part process. The steps in part 1 (performed in CIM) only need to be performed once. The steps in part 2 (performed in WEN) must be repeated for every term the course is offered.
Part 1: Add the Discussion/Lab Section Type to a Course
1. Log into CIM https://next.catalog.yale.edu/courseadmin/.
2. Search for the course in the search box, using the Subject Code and Course Number.
3. After finding the course, click the Edit Course button.
4. In the new window ⇒ Are you adding discussion/lab sections to this course? ⇒ click Yes

5. Fill in the following sections/fields:
a. Effective term—Select from the drop-down menu.
b. Instructor—Fill in the instructor’s first and last name, rank, and department.
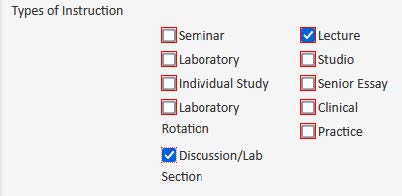
c. Types of Instruction—Click the Discussion/Lab Section option. Leave any other options as they are.
6. At the bottom of the page, click the Start Workflow button.
Note: After starting the workflow, the form will go directly to the Banner queue. You will be able to offer discussion/lab sections in WEN for the course the following day, after the overnight database refresh runs.
The wait is only necessary for the initial course modification to make it available for adding discussion/lab sections. Do not repeat part 1 for section additions/modifications to the same course.
Part 2: Offer & Link Discussion/Lab Sections in WEN
You must wait at least overnight between following the steps in Part 1 before performing the steps in Part 2.
Offer the Section(s)
1. Log in to WEN: https://next.catalog.yale.edu/wen/
2. Click to select the desired term.
3. Scroll down to locate your department then double-click on it to select it.
4. Locate the lecture in which you want to offer and link the discussion/lab section, then double-click its title to expand it.
5. Click the plus sign button on the far right.
6. In the new window there are five fields to update and an optional field to edit: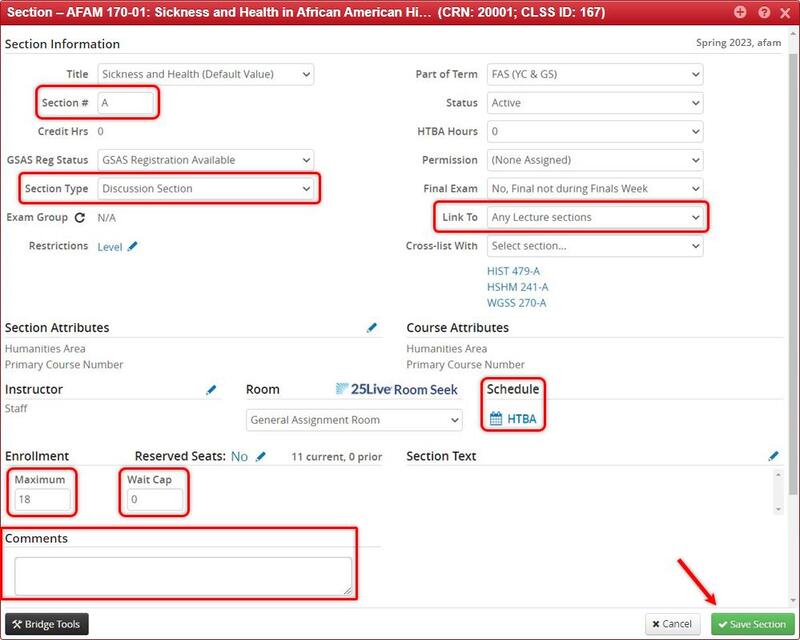
a. Section #—Use capital letters in this field, not numbers. Use A for your first section, B for the next section, and so on.
b. Section Type—Select Discussion Section from the drop-down menu.
c. Enrollment—Enter either 15 or 18. Note: If it is a WR section, you must use 15.
d. Wait Cap—The default is 0. To create a waitlist, enter a number in this field.
e. Schedule—Select an available option from the list of approved standard meeting times.
f. Link To—Select Any Lecture sections from the drop-down menu.
g. Comments—This field is optional. You are encouraged to enter the following details if applicable:
i. TF name
ii. Indicate if it is a back-to-back section.
iii. Provide any justification for non-standard maximum enrollment.
h. Additional fields you are encouraged to complete:
i. Title—If the section is intended for a specific student demographic, or if it is a WR section, please indicate as such.
ii. Room—Preassign a classroom managed by your department, if applicable.
i. Click the Save Section button to close the editing window.
Note: Do not reopen the discussion section for modifications until you link the lecture to the section(s) in step 8.
7. Repeat step 6 for each section you want to add to the course.
Link the Lecture to Section(s)
8. Once you have created the discussion/lab section(s), open the editing window for the lecture course to link the lecture to the sections.
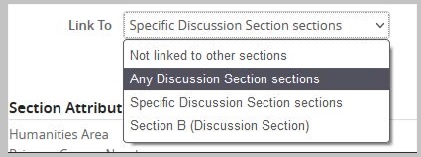
a. Update the Link To field—Select Any Discussion Section sections from the drop-down menu.
b. Click the Save Section button.
Note: If you later decide to add more discussion/lab sections to the same course:
• Do not repeat adding the discussion/lab section type to a course (part 1).
• Repeat the steps in part 2 to offer the sections but skip linking the lecture to section(s) (step 8).