Log into the Yale Hub and Navigate to the Registration System
Before registering for classes, we recommend first browsing the class offerings on Yale Course Search to see greater detail on the classes that interest you.
1. Log into Yale Hub.
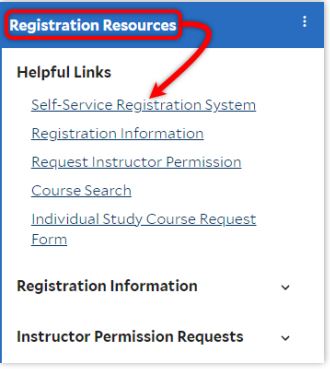
2. Locate the Registration Resources tile.
3. Click the Self-Service Registration System link under Helpful Links.
Search for and Add Classes to your Schedule
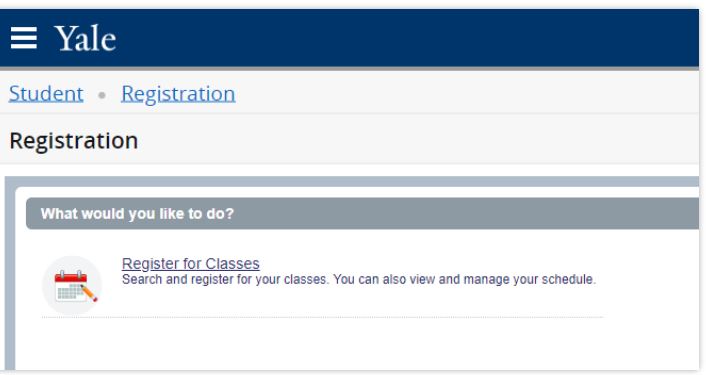
1. Click Register for Classes.
2. Select the desired term, then click Continue.
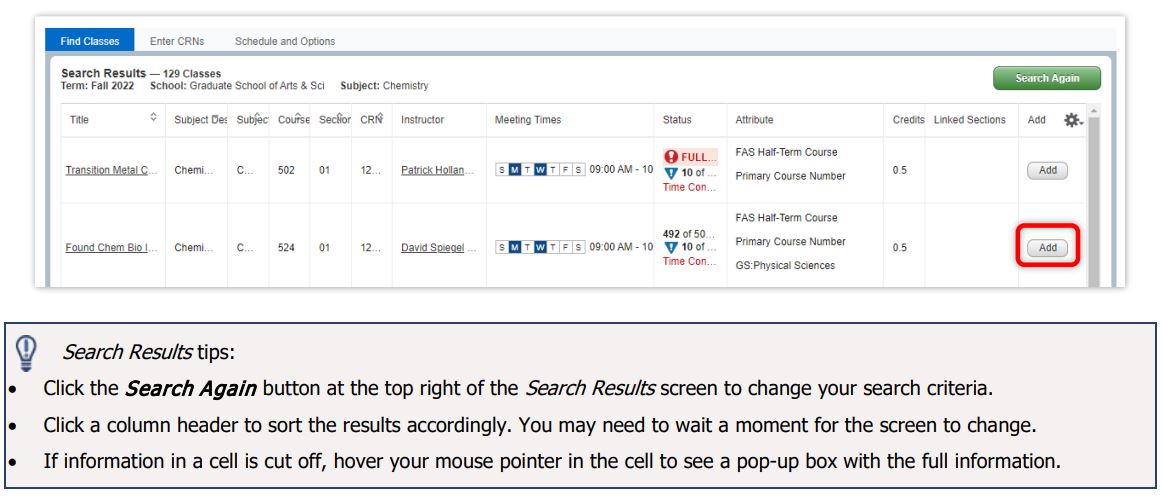
3. Search for your desired class. The Find Classes tab has a form with several options for searching through the inventory of offered classes. Use any combination of the available options.
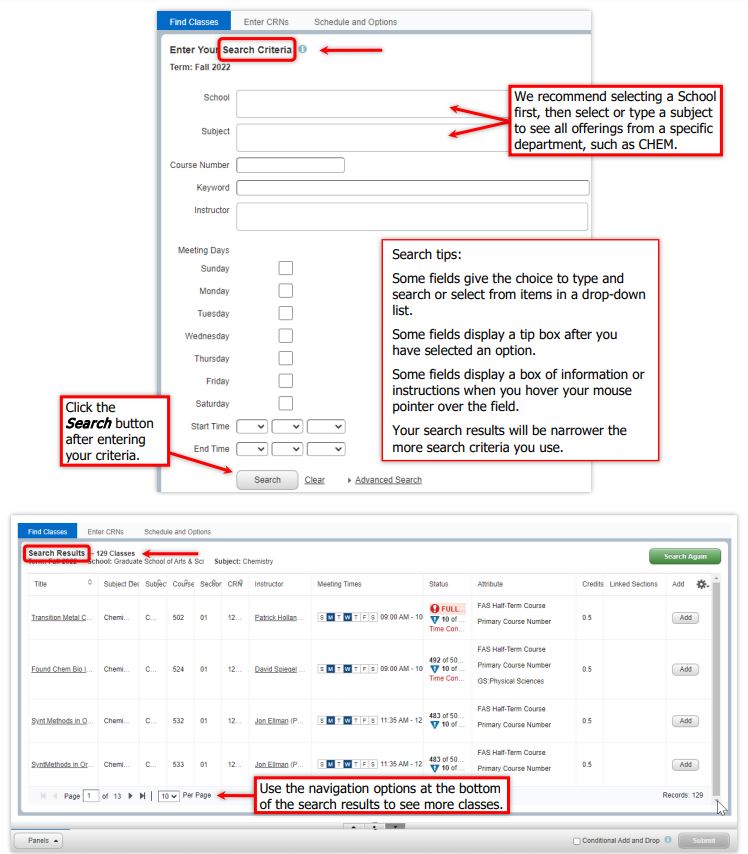
4. Once you find the desired class, add it to your schedule.
- Click the Add button to add a class you desire to your schedule. Take note of text warnings that indicate an issue that might affect your ability to register (such as enrollment restrictions).
- Click the class title to see a pop-up box with more class details. Pay attention to information in the Status column that might affect your ability to register for the class.
5. Review courses on your worksheet and complete registration.
- When you add classes to your schedule, a panel expands from the bottom of the screen.
- Any actions—including registering, requesting instructor permission, waitlisting, dropping courses, etc.—are not complete until you click the Submit button in the bottom right corner. Instructor permission and waitlisting actions require further action.
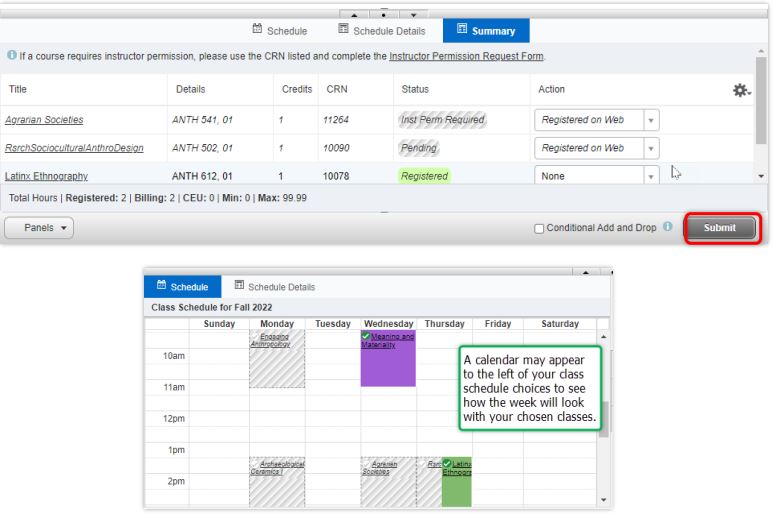
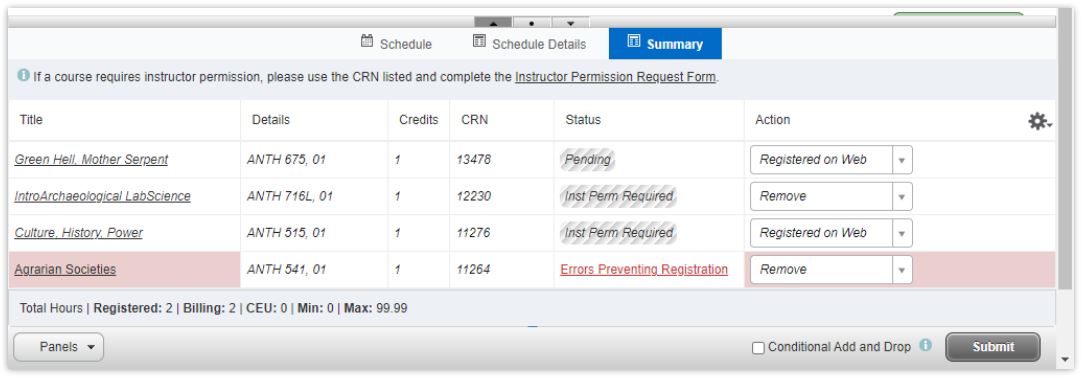
6. For each class, review the Status and Action columns.
|
Status column |
Action column |
|
|
Errors Preventing Registration—You cannot register for the course. If you want to remove this course from your schedule, click Remove in the Action column and then click Submit. |
Dropped On Web—Select this option to drop a class for which you have already registered. See |
|
|
Inst Perm Required—See the link at the top of the list of courses and follow the directions. Once approved, return to the Summary screen to add the class to your schedule. See How to Request Instructor Permission. |
Remove— Select this option to remove a class from your schedule for which you are not yet registered. |
|
|
Pending—Displays if you are allowed to register for the class. You must click Submit to complete registration. |
Registered on Web—Select this option to register for the target class. This option is only available for classes that will allow your registration, including when instructor permission is needed. You must click Submit to complete the registration process. |
|
|
Registered—You have successfully registered for the class. |
Wait List Web—Select this option to be added to the class’s wait list. This option is only available if a class is already full and waitlisting is allowed. This does require further action if a seat on the wait list opens. |
7. After you have successfully registered for a class, Registered will appear in the Status column.